Redmine is a renowned open-source project management tool with powerful functions and user-friendly interface. .
In this article, we want to walk you through the process of getting Redmine up and running in a way that will immediately benefit your business.
With this guide, you will learn how to set up and run Redmine in the following steps:
- Step 1. Create an Account
- Step 2. Check Up Default Settings
- Step 3. Adjust Roles, Statuses, Trackers and Workflows
- Step 4. Create a Project
- Step 5. Activate Other Users
- Step 6. Create an Issue
- Step 7. Start Organizing Your Work
Step 1. Create an Account
First, you have to do a pretty obvious thing: installing Redmine. You will find an undeniably clear instruction for various supported database backends on Redmine.org. So, let’s not dwell on that and move to creating your profile.
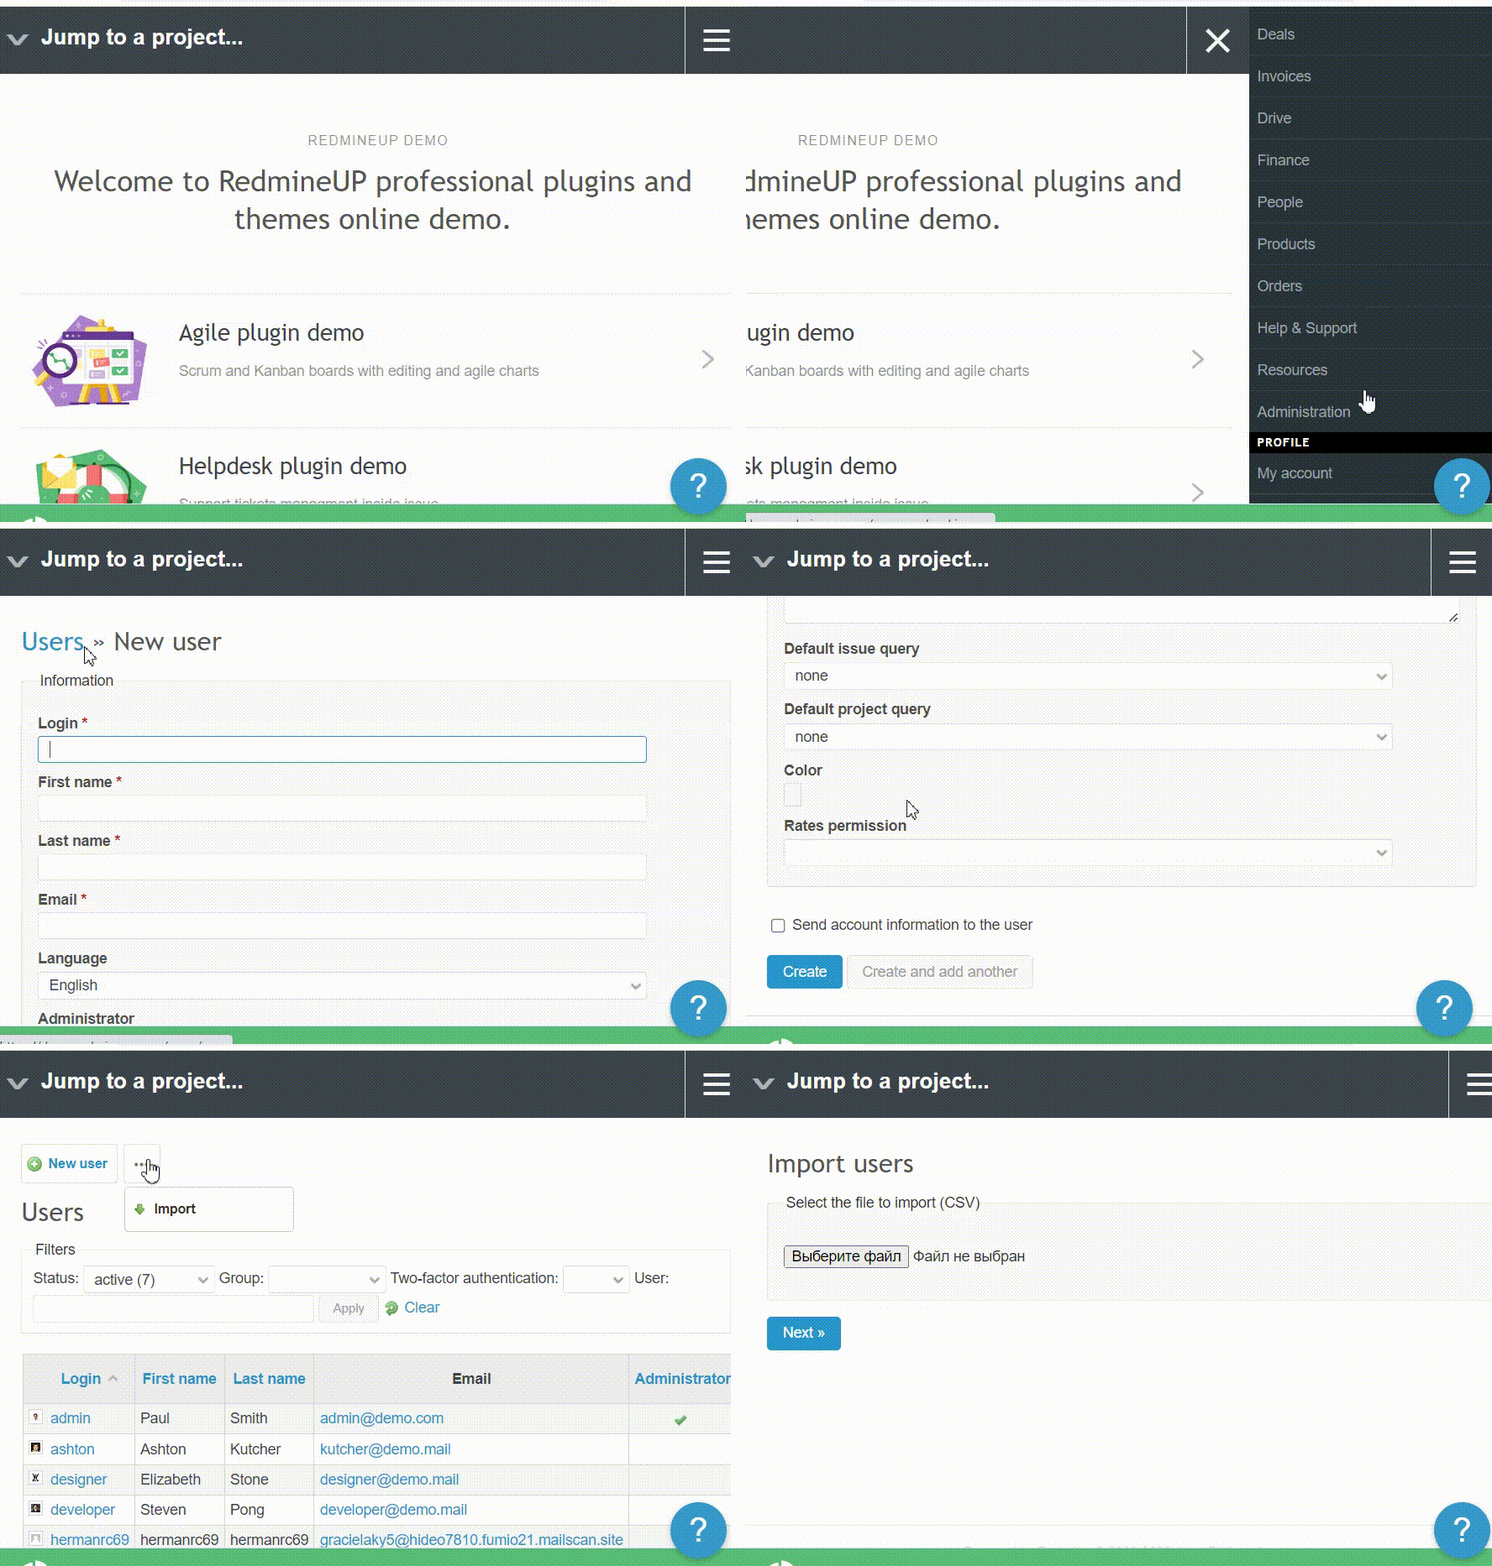
You are building up the admin profile. It means that you are in charge of organizing and managing the work of other users, i. e. your team. It is also possible that non-administrator users will manage projects, but it fully depends on the permissions an admin gives them.
After signing in, you will see the homepage.
Step 2. Check Up Default Settings
Although Redmine is pre-configured and easy to start, we highly recommend you to get acquainted with the system by checking your settings. Just go to the administration area and learn more about the system: Projects, Issues, Users, Authentication, Custom Fields, anything you find important to know.
Migrate to secure hosting
Don't waste your time on Redmine maintenance. Hire experts and focus on your projects
Step 3. Adjust Roles, Statuses, Trackers and Workflows
Make sure you check Roles and permissions. Roles are used to define what each user is allowed to see and do within a project. The default role options are Manager, Developer and Reporter, but you can add more according to the needs of your company. Thus, a role will affect permissions directly on the workflow and across all the project aspects. For instance, a Manager is able to reject an issue while a Developer is not.
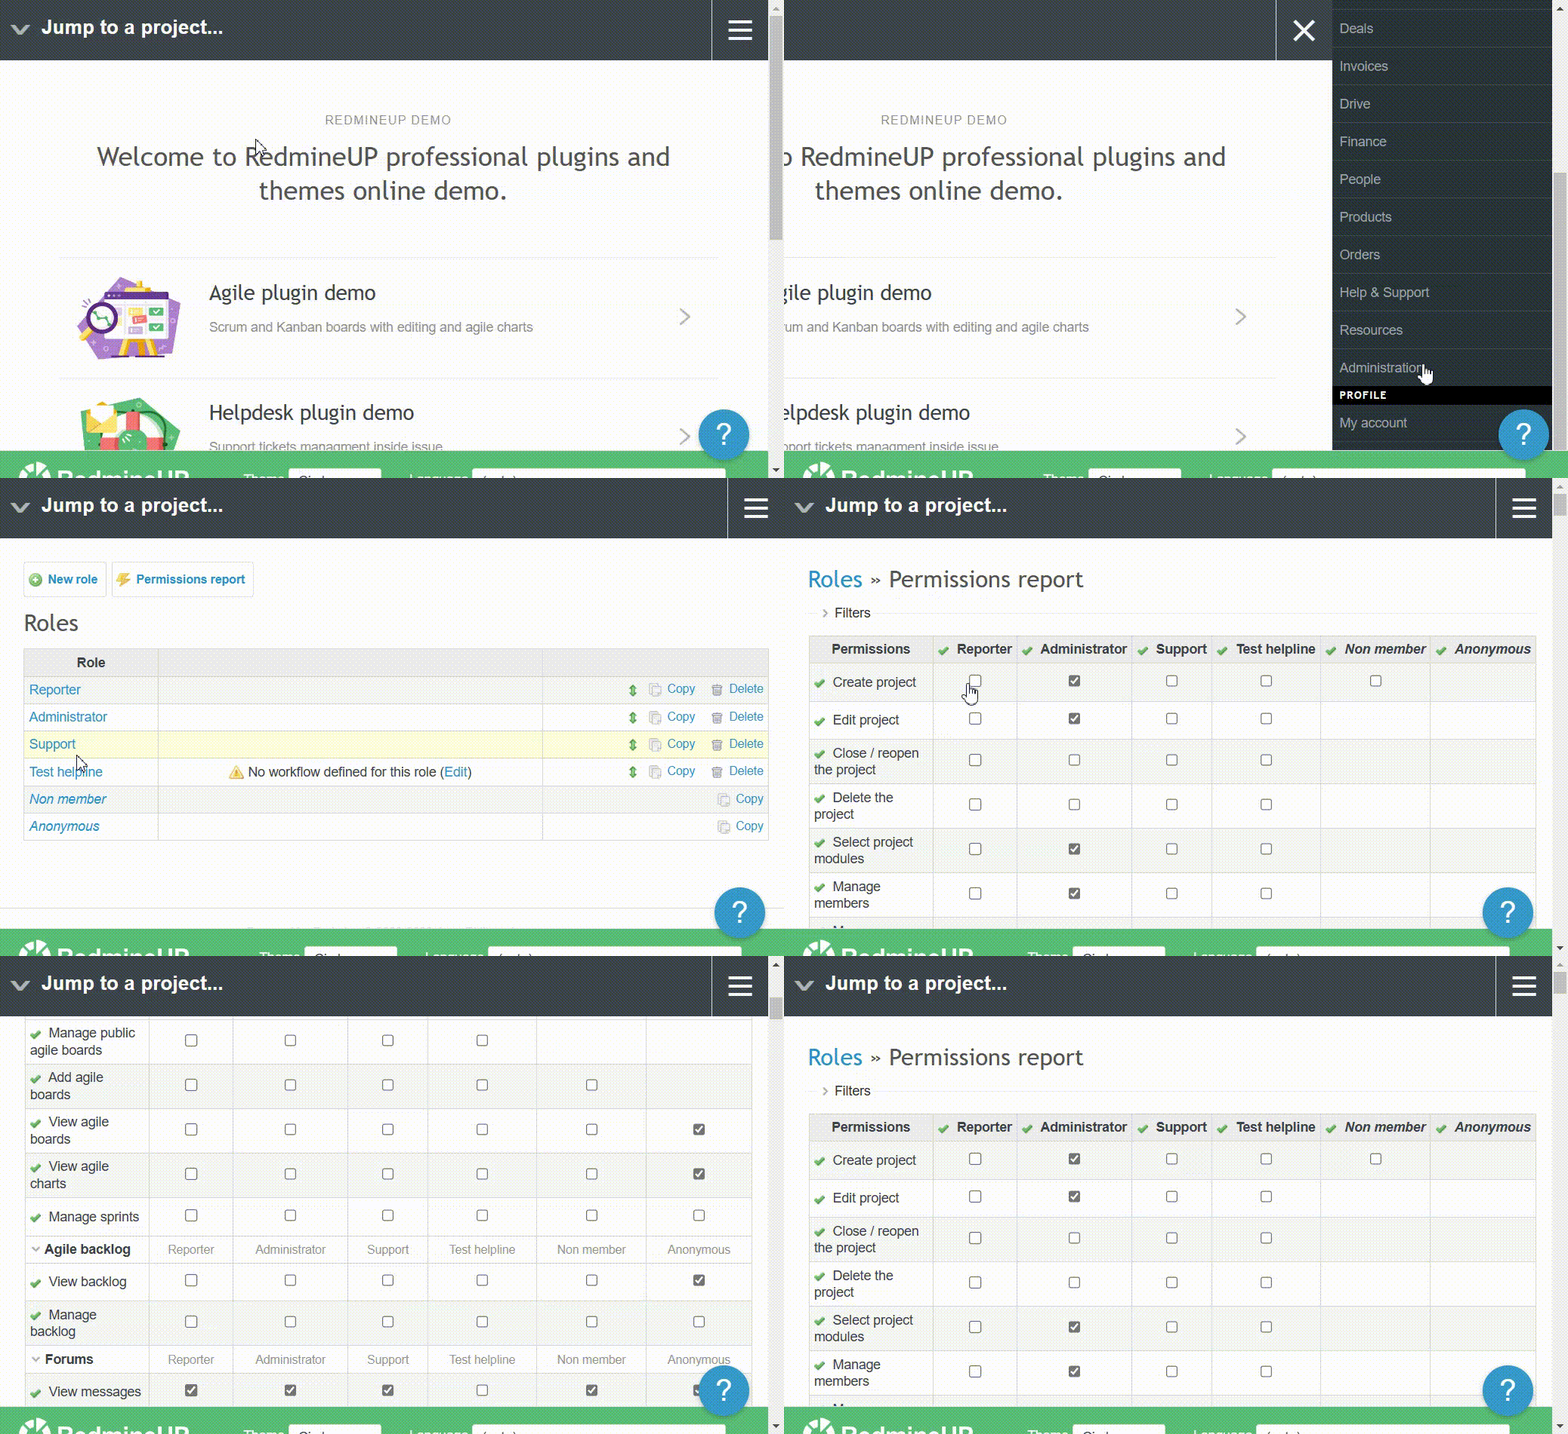
Then go to Issues Statuses, Trackers and Workflows. These are of particular importance for your future project as they basically constitute it. Of course, you may customize it (if necessary) by adding something new or, on the contrary, deleting the irrelevant ones.
Step 4. Create a Project
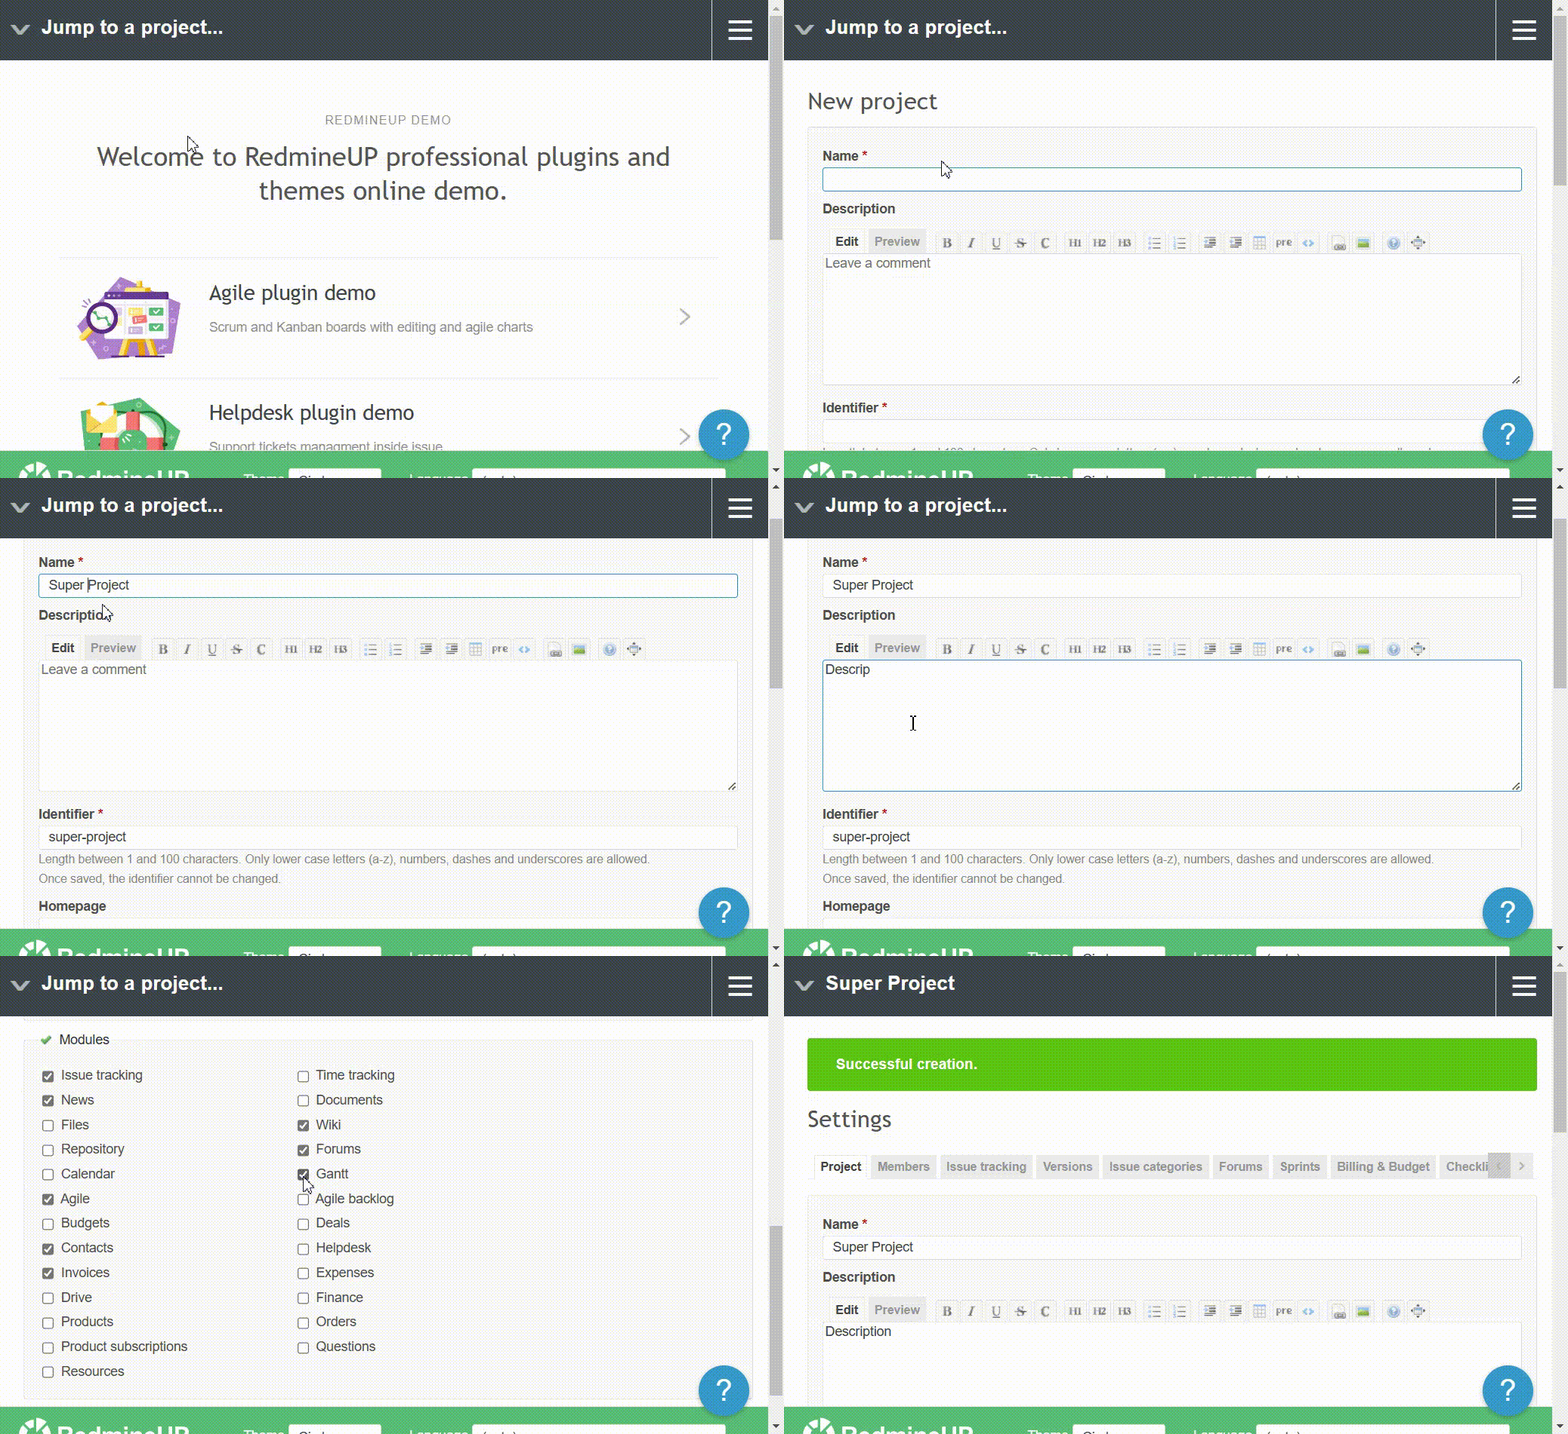
It is high time to create your first project – it is here where all the magic begins. Go to Projects in the upper left corner and click on New Project in the upper-right section.
Note: We want to make your initiation smooth and not to overwhelm you by an astonishing range of the Redmine fancy features, so let’s start with a basic project by activating the following modules: Issue and Time Tracking, Gantt and Wikis.
You need to fill in the required data. All the sections are quite clear, except one. Project Identifier is used internally by Redmine for URLs and other things you do not have to worry about.
After you are done with the project details, click on the button Create or Create and continue. That is it! Now your project will be visualized on the home page.
Step 5. Activate Other Users
The moment has come to add other users to your project and finally start managing. Remember that users are manually activated. Once the user is registered, go to the project settings and choose the section Members. Then click on New member.
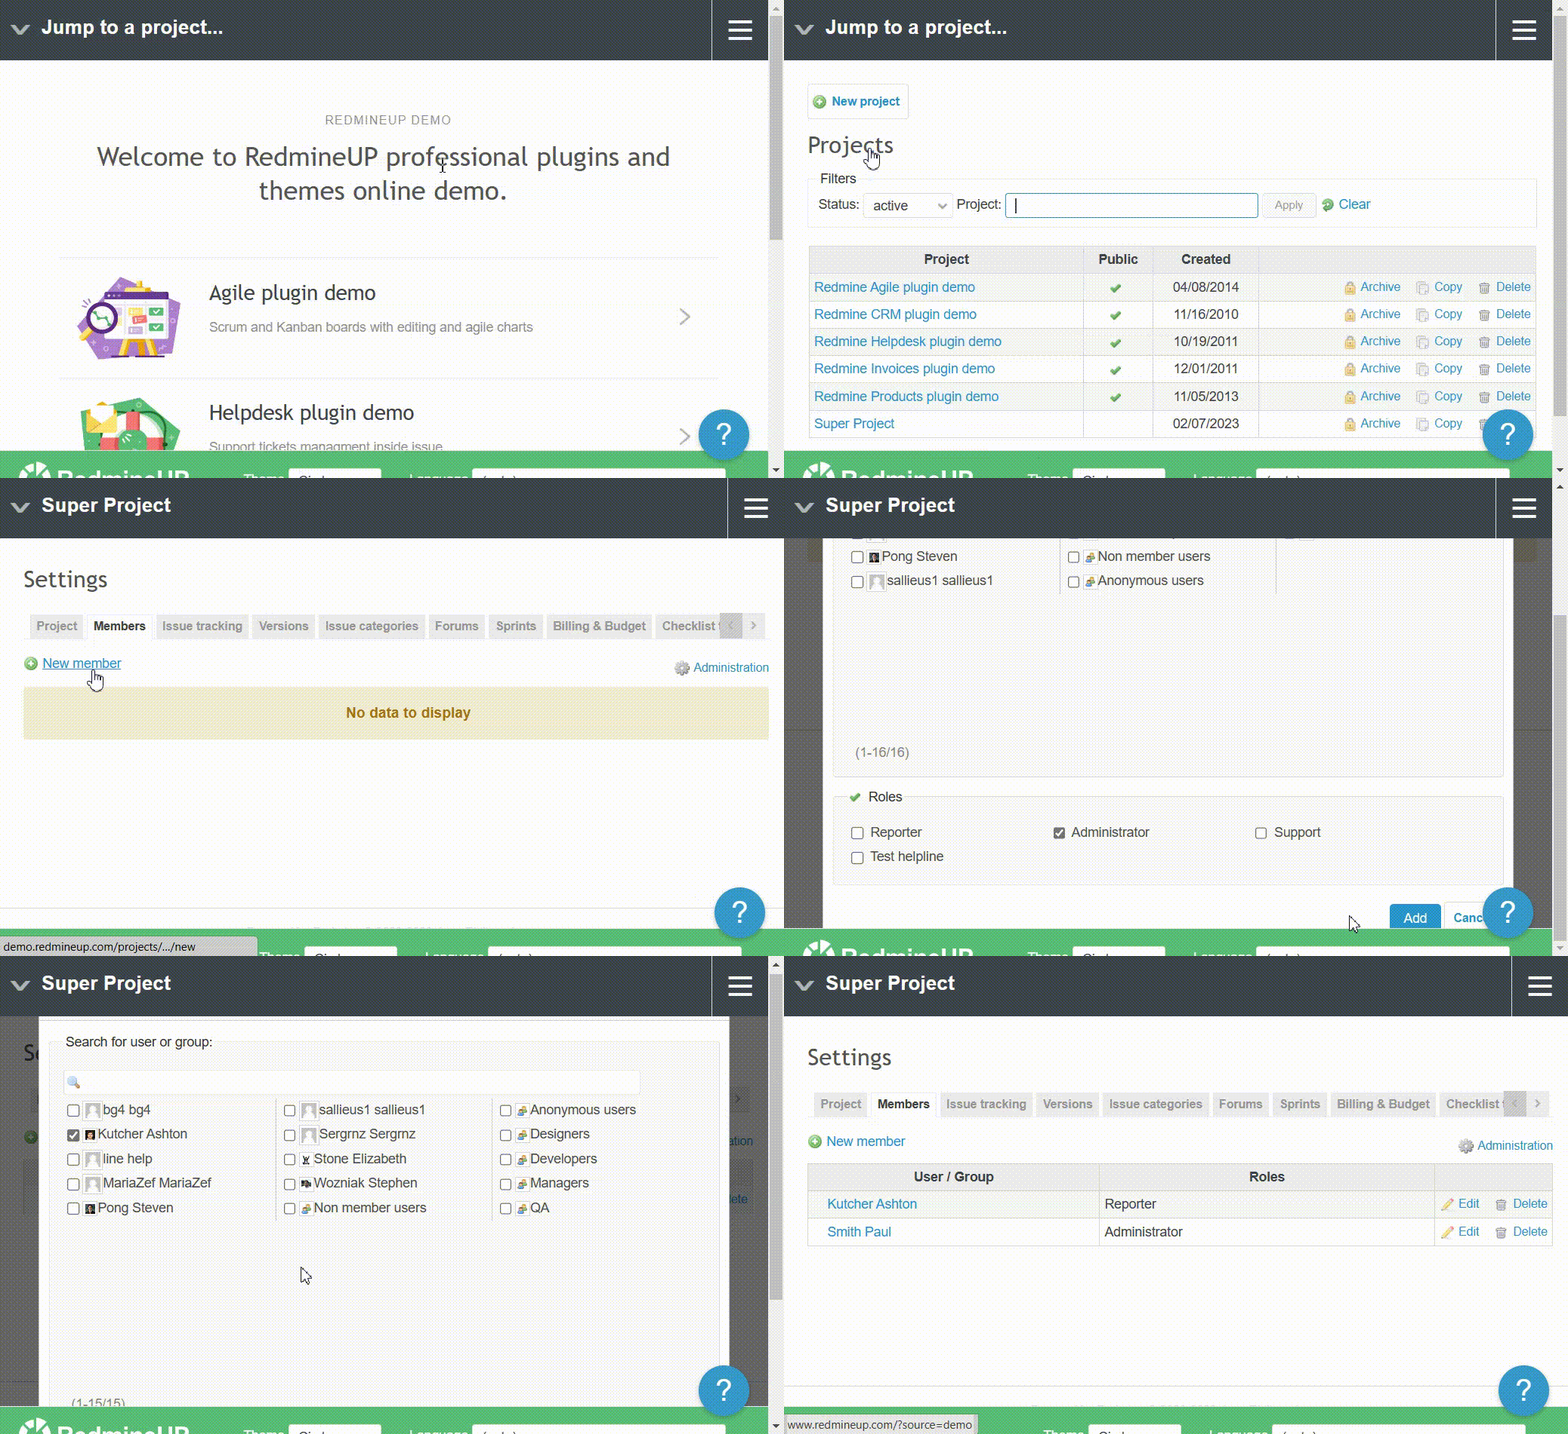
Remember that it is equally easy to remove a member from the team in case he/she is no longer working on the project. Just click on Delete next to the name.
After adding new members, it is about time to assign them the project roles. As an admin, you are able to choose one or more roles from the list you approved before.
Migrate to secure hosting
Don't waste your time on Redmine maintenance. Hire experts and focus on your projects
Step 6. Create an Issue
And finally, let’s create your first issue for the present project. Navigate to the section Issues and choose New issues. As you did with the project settings, fill in the information needed.
Here you choose a team member who will be responsible for realizing this particular task and give him/her a full insight of what needs to be done.
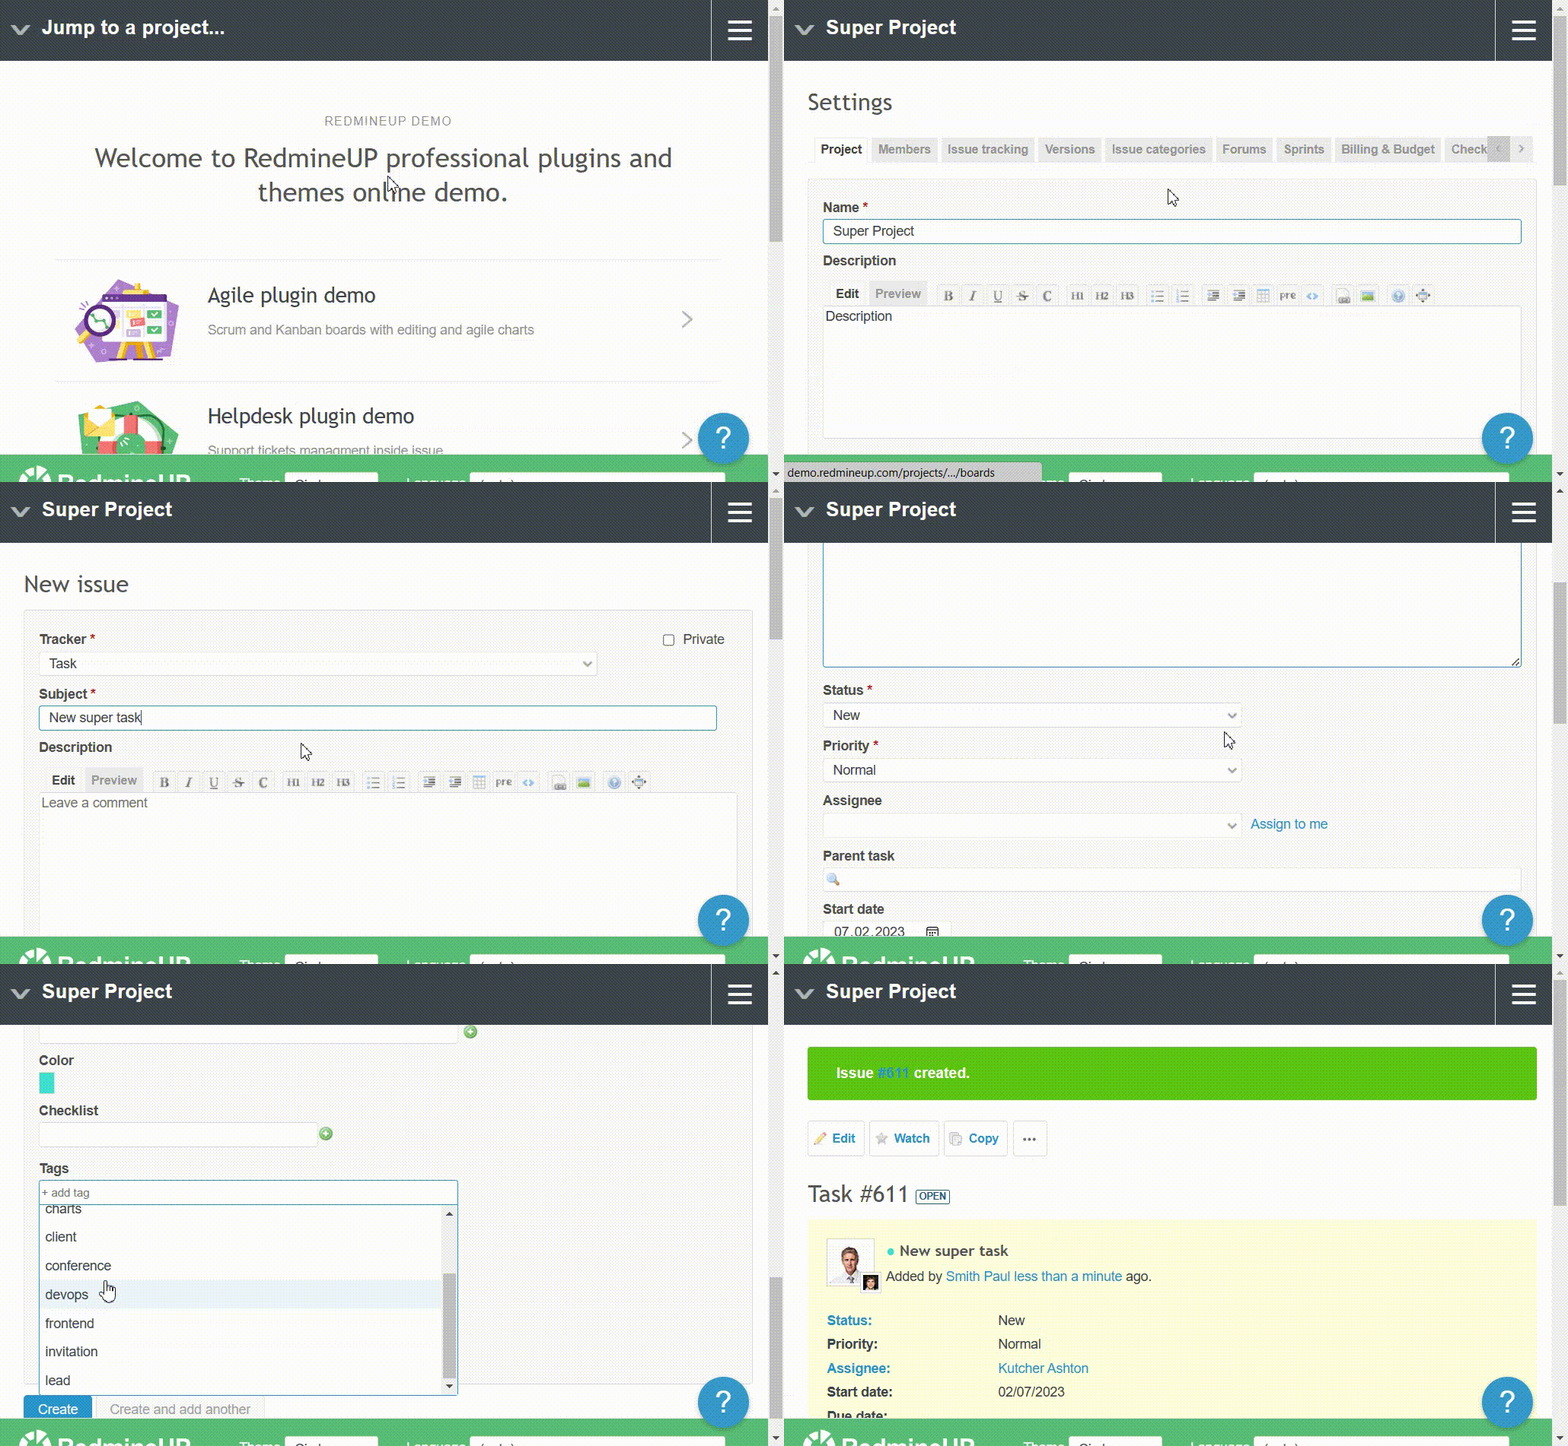
By the way, recall that statuses, as well as trackers, are dependent on what options you selected during step 3. So, if you want to change something, just check your settings again.
Step 7. Start Organizing Your Work
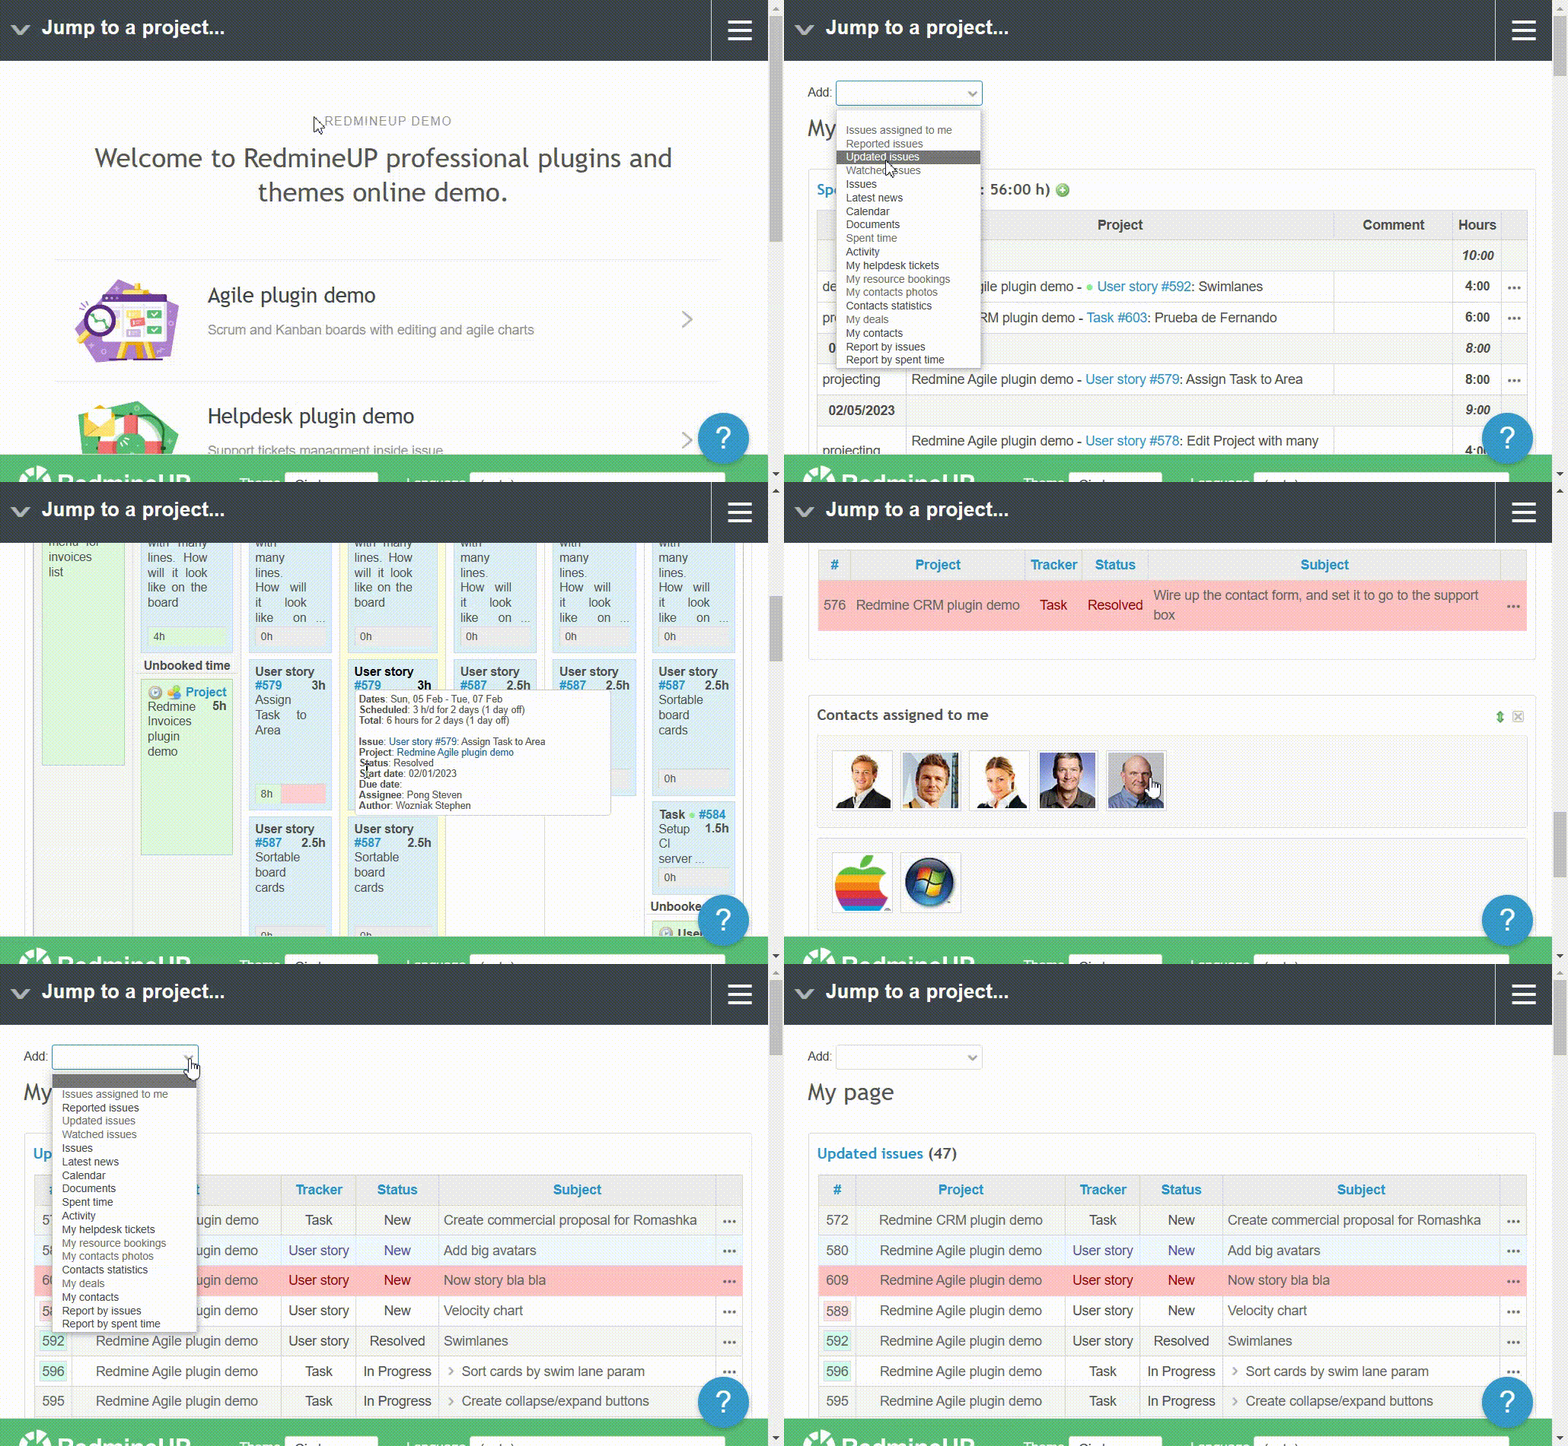
After you have created your first project, it becomes possible to view and organize your work in any way you consider more convenient. For example, RedmineUP provides users with a very useful tab called My page. Here you will find all the relevant information about your team productivity: any changes performed, timetable, assignees, task statuses. All the fields can be edited and easily customized.
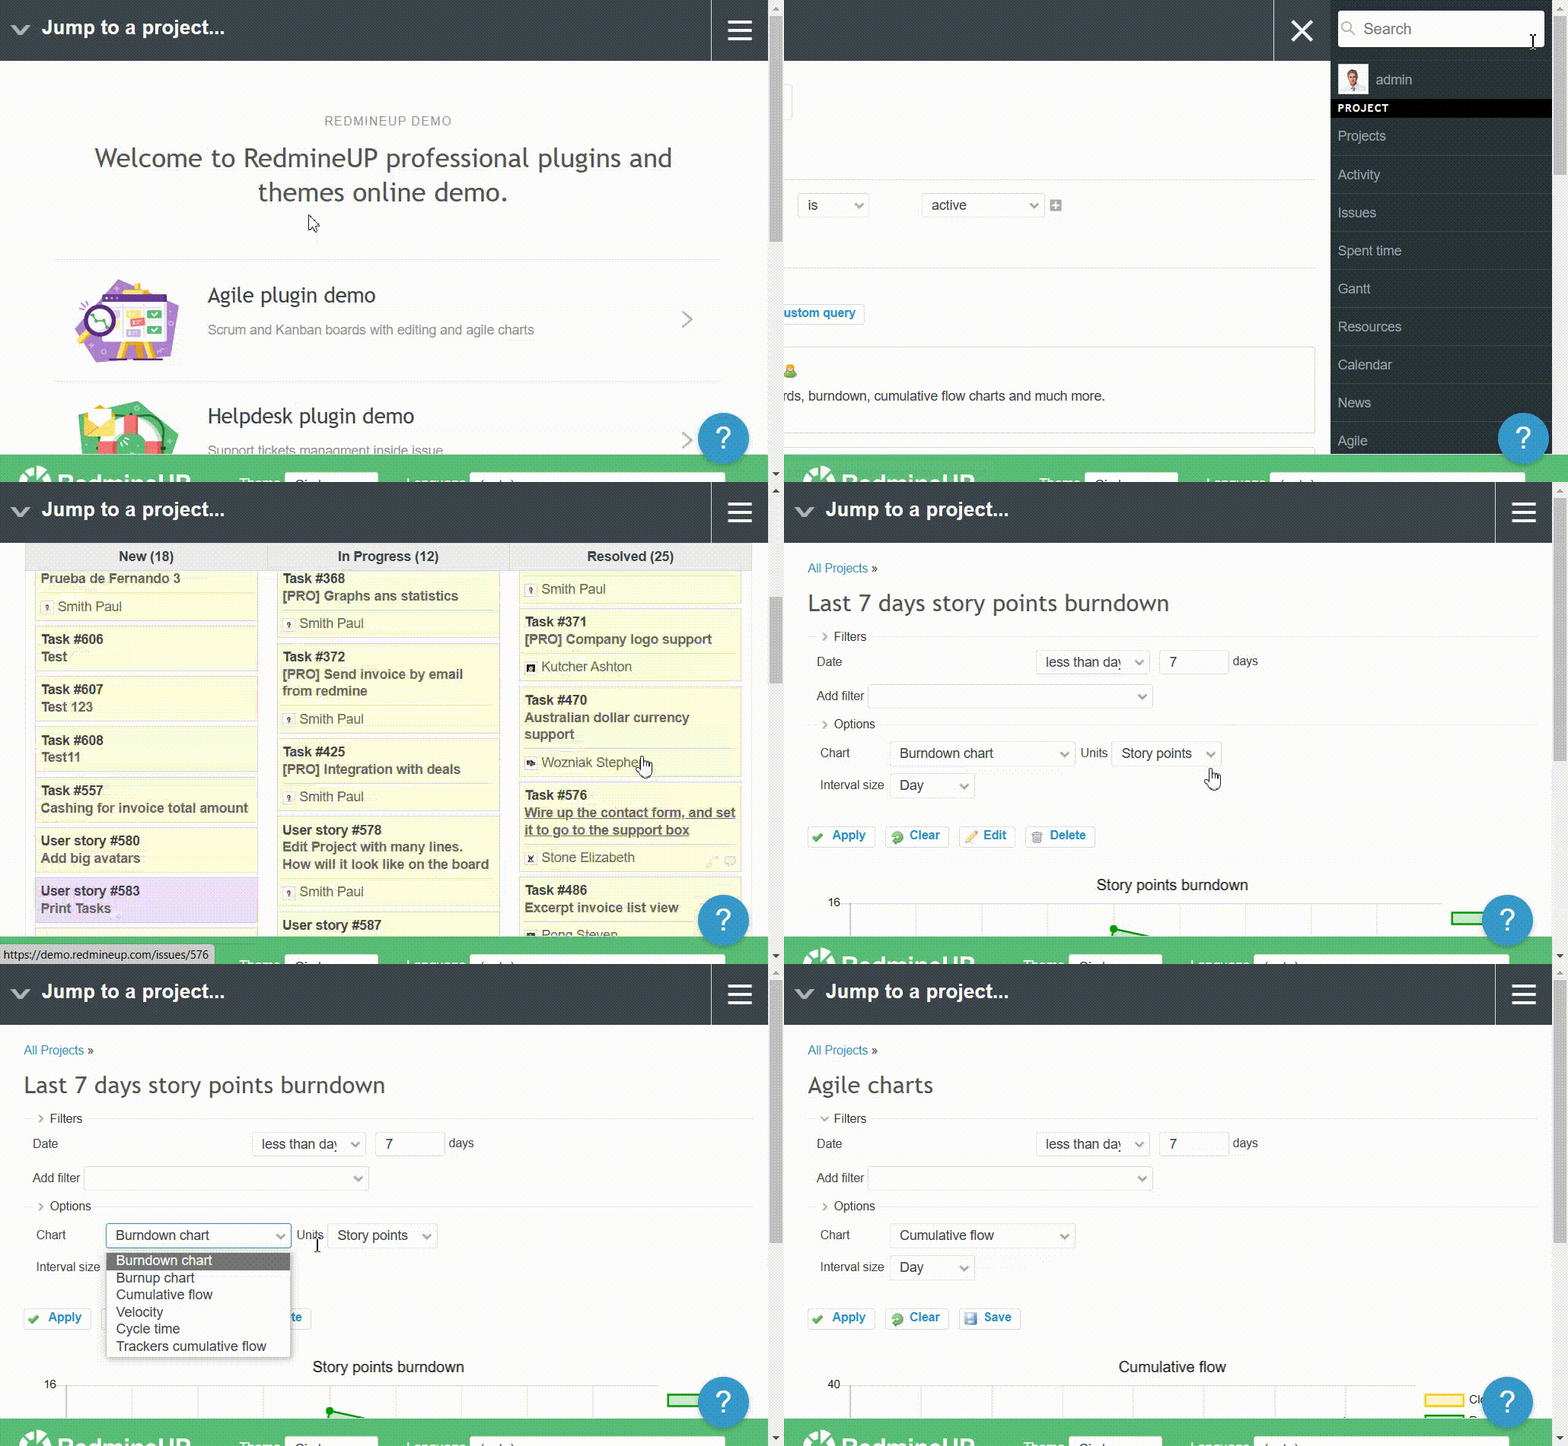
Another graphical representation that may be quite helpful is a project chart. Thanks to the feature, our clients are aware of all the current tasks so that it is no problem for them to fix possible activity slumps with task adjustments. To add a chart, go to the section Agile and find the tab Agile charts on the right side. Then choose the chart type, units you want to be visualized and the interval size. Finally, click on the button Apply and start boosting your team work!
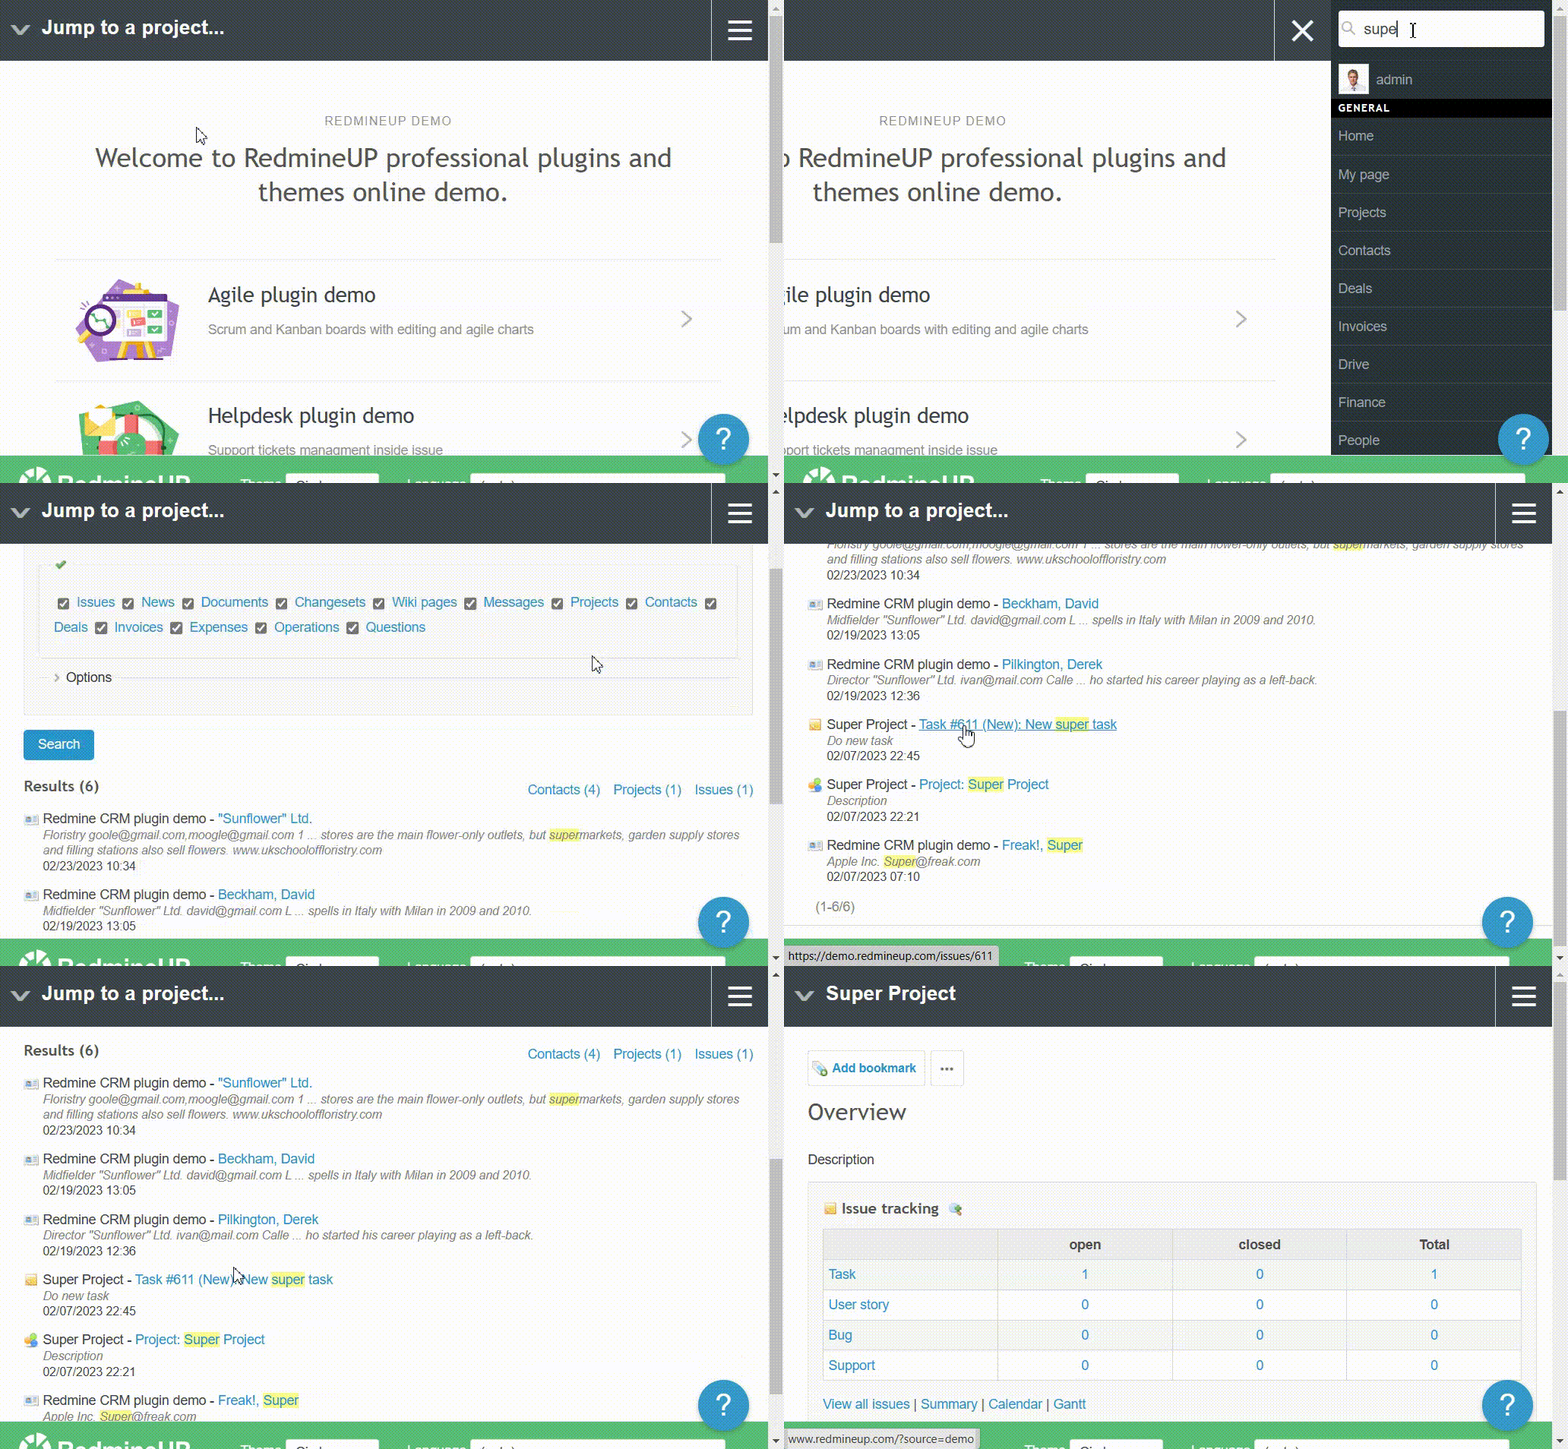
Obviously, the more projects and issues you have, the more complicated the search process is. But there is no need to worry: with RedmineUP it is no longer a problem. Try our live search in the upper-right corner and locate any project or issue quickly. You can choose from the list of filters and search, for instance, in a specific project or among all of them.
Now You Are a Redmine Pro!
Congratulations! You have just handled your first project in Redmine so that it could not have been better. Now you can get straight to work and take advantage of any feature Redmine offers.
But if you want to upgrade the work of your team even more, do not miss the chance to try professional hosting from RedmineUP and stay focused on your goals, not technical maintenance.


